Self Study 5
In this week for self study we learnt about using lighting and Shadergraphs within our unity project to make our game look more realistic.
Lighting:
Adding lighting to the project was quite simple, first i used a tutorial to show me how to add lighting to a unity project and followed along using their unity project, and creating my own lighting with the scene. The tutorial i used was LIGHTING in Unity, in his video description he has links for you to be able to download and access his models he used with the unity project.
The first thing after creating the unity project was to add a new 3D object to the project which as a panel. Then find the area you want to place the panel and resize it to match the size of the light that you want (Make sure when moving the panel you can see the coloured face of the panel, if you have it the wrong way it will look clear). Once you have the panel in place, make a new material and add it to the panel. In the material settings you are going to turn the emission on, and change the HDR colour of the light to the one you want, the change the intensity of the HDR to 1.5. Make sure to change any objects that are going to be effected by the light to static (This should trigger unity to bake the light for you).
If you are unlucky like me and unity does not bake your light automatically, just open the light window and the catergory scene, down the bottom there will be a "generate lighting" button, press that. depending on your computer this will take a while, so be prepared to wait, or go do something else while you wait.
This image is the project from the tutorial, i decided to make more of a horror movie vibe using red lights. I did this because it was the only thing that came to mind when looking at a lone monkey's head sitting in a room.
(Insert image here)
(May or may not have forgotten to transfer this project across when i changed which computer I was working on, will add image later on)
then taking my knowledge that i learnt from the tutorial I applied it to my own unity project that i have been working on during the self study/tutorials.
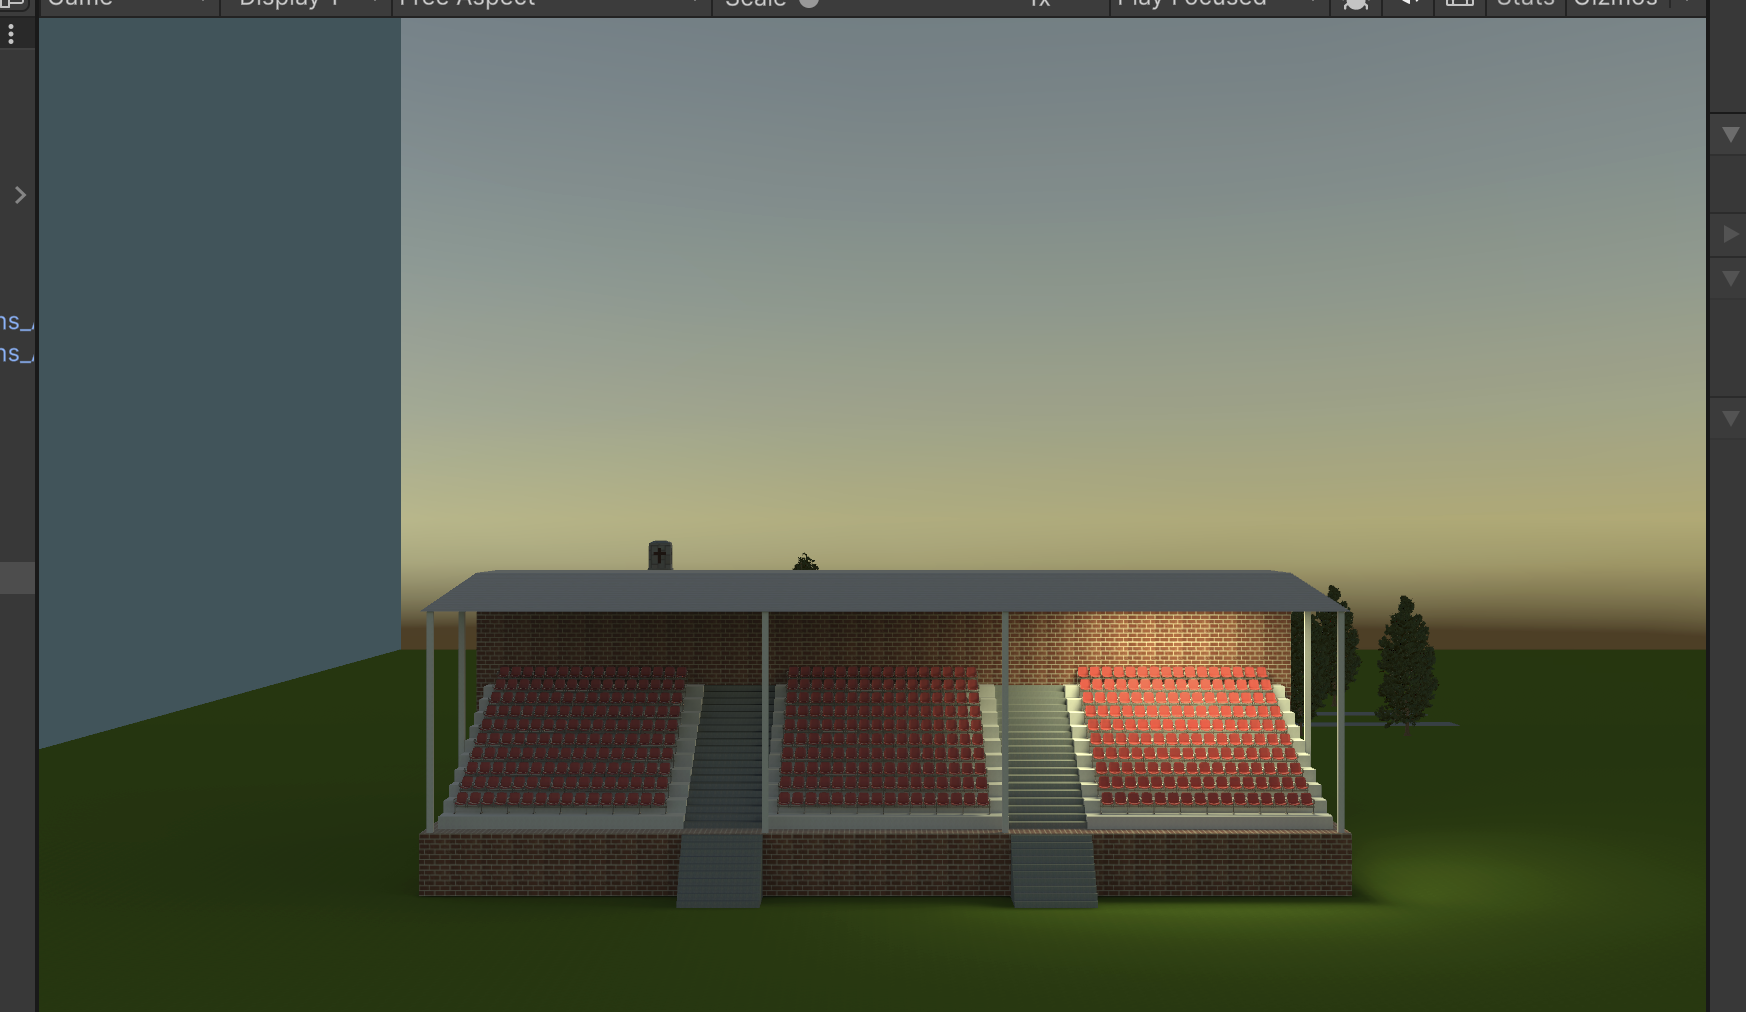
(Yes I will add lighting above all seats, but that will happen before next self study).
I decided that is was the best type of lighting that i could add to my project as a starting point. I plan on adding more lights around the Cenotaph acting like spotlights or pathway lights.
I did this my making the light sit above the seats and act like a ceiling light, without blinding the person looking at the screen. As when I tried making the light sit against the back wall of the mini stadium, it didn't cast enough light over the seats like the normal stadium lights do, and it also just created a bright white patch on the back wall the looked weird. So this position was the best for giving more natural lighting on the seats.
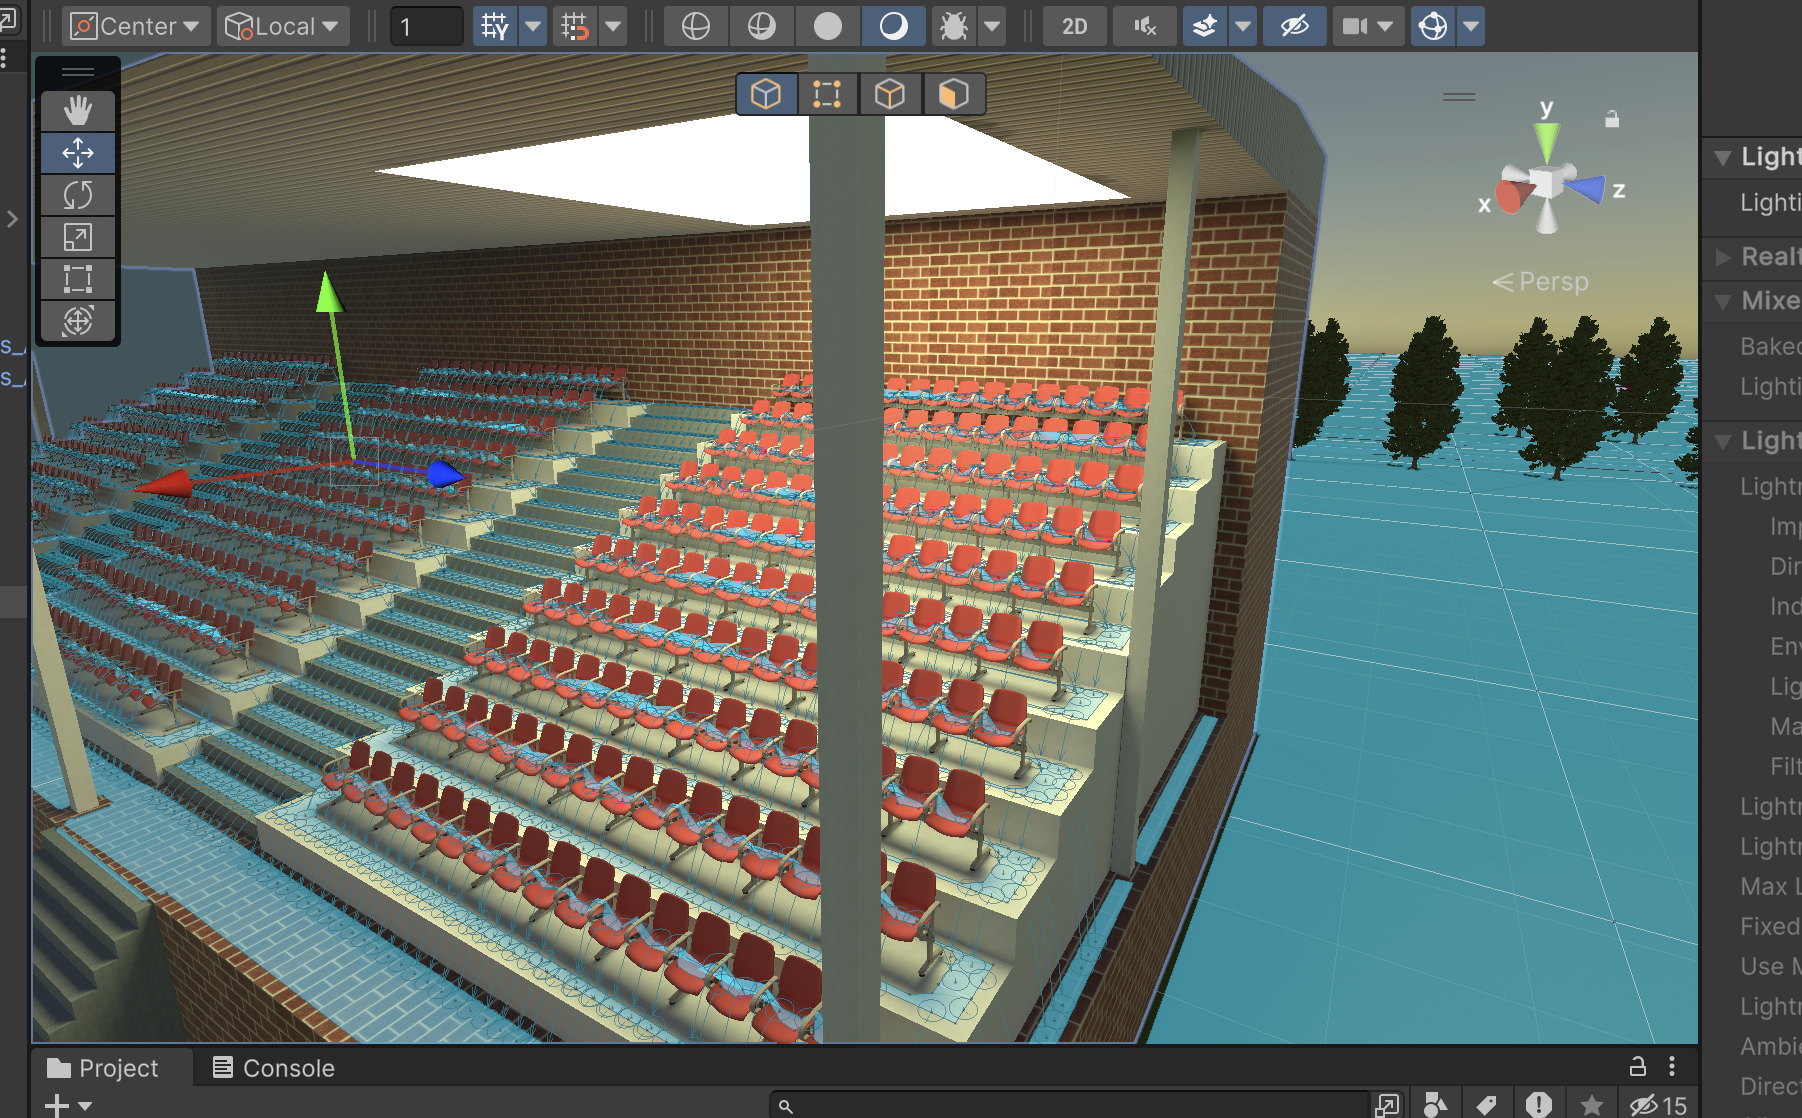
ShaderGraph:
To start off I watched a tutorial Basics of Shader Graph - Unity Tutorial that showed me the basics of using unity shadergraph. The only difference if that i used a BuiltIn Lit Shader Graph, where the tutorial used a PBR Graph, thats because has now undaeted their software since the video and the PBR graph system is included in the Lit graph system now.
This an image of my Lit shader graph nodes. I used these to create a outside ring of colour that has a timed affect, that fades the colour in and out from the set time.
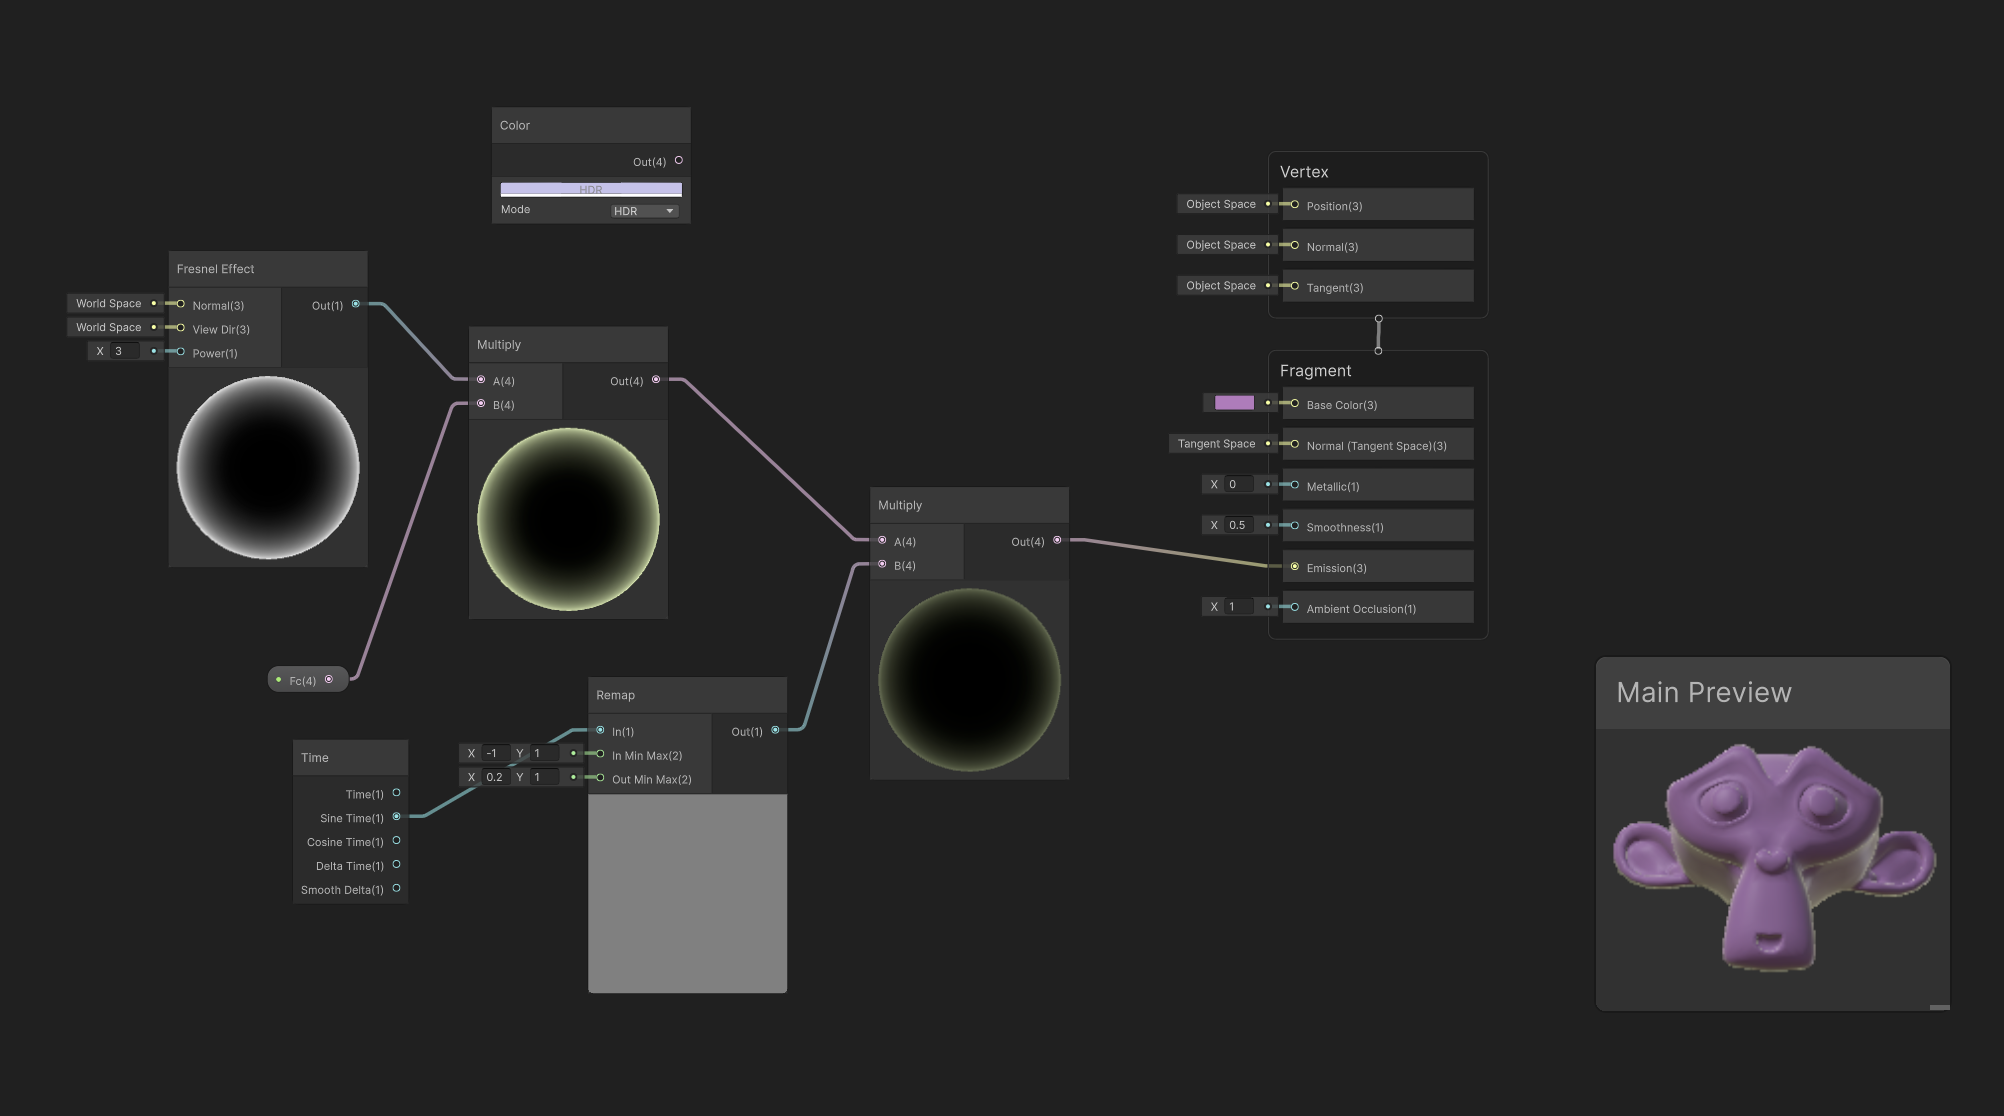
I picked my colours to be green and purple that way the colour change is more noticeable. Here's a GIF of the material going through the colour change.
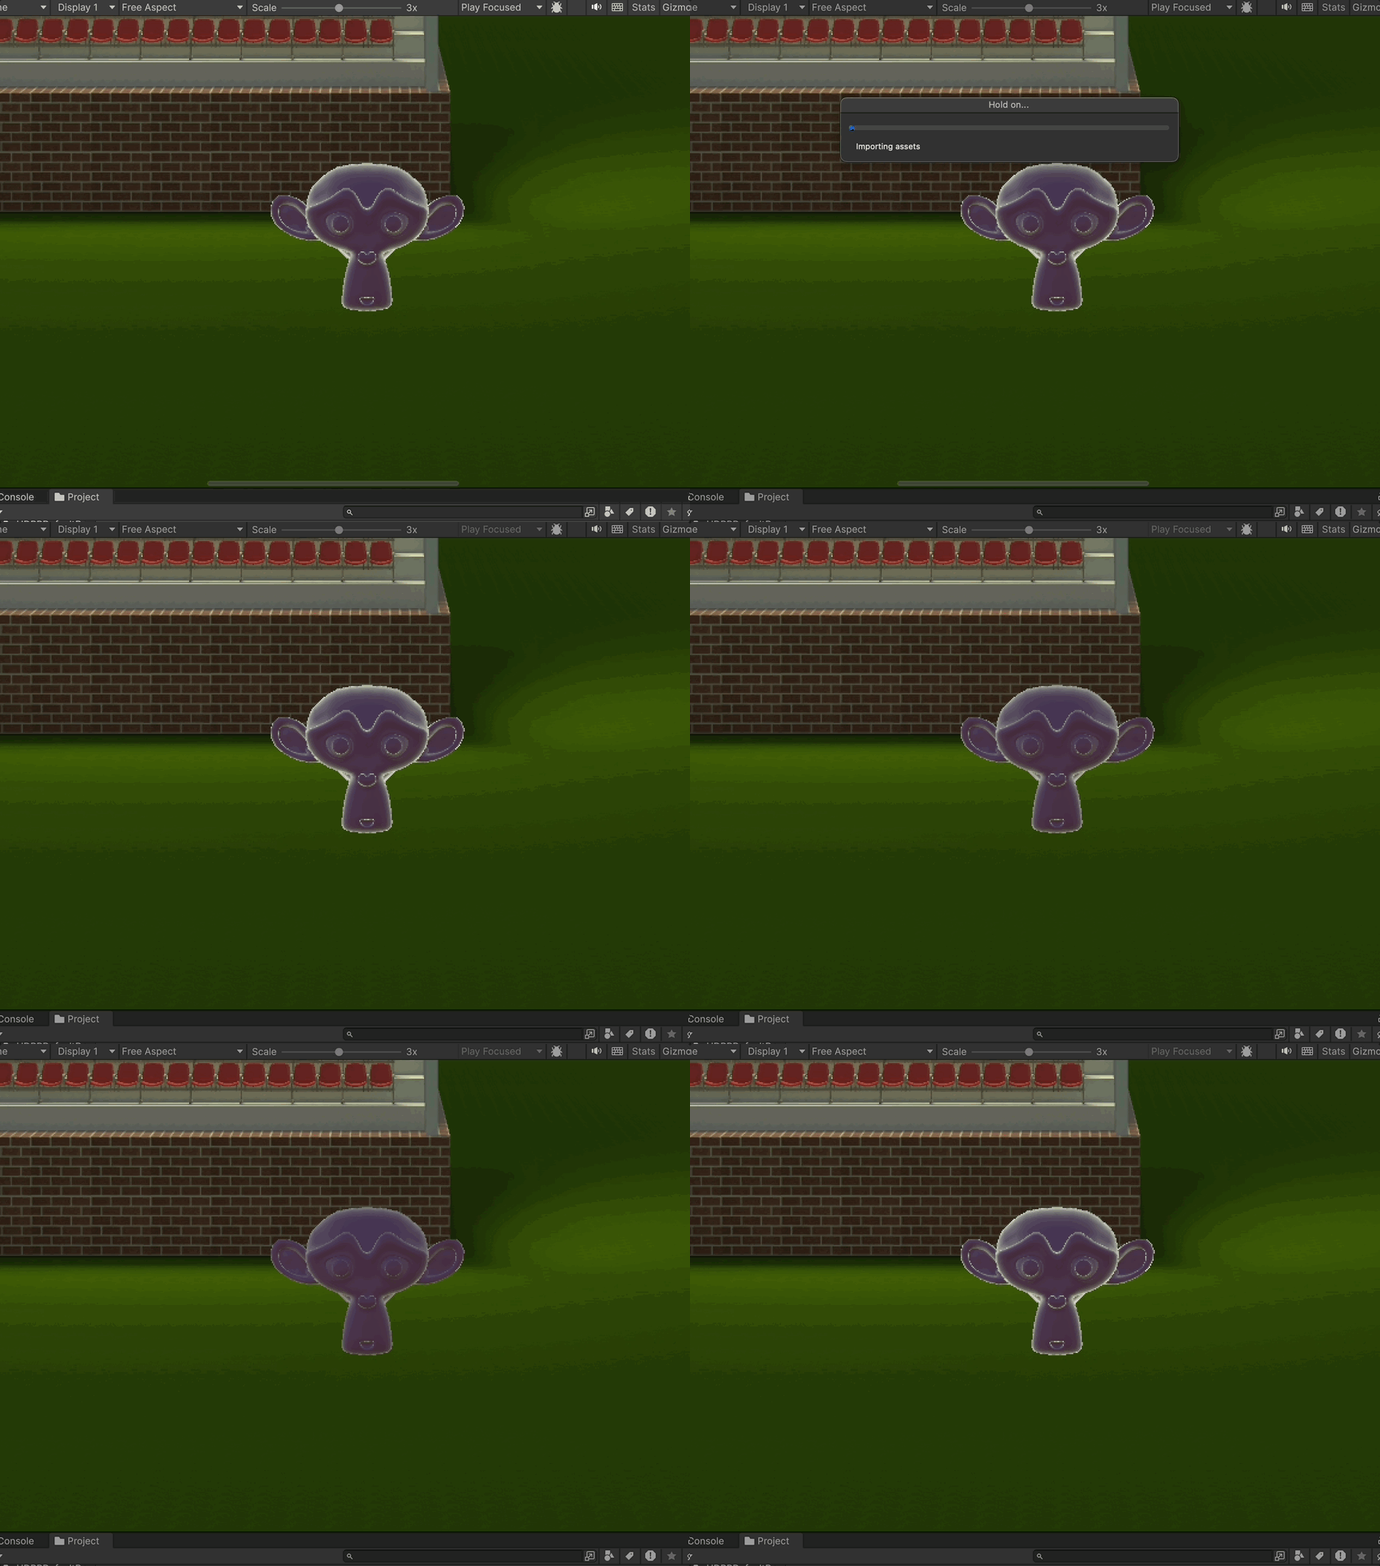
I then used a tutorial DISSOLVE using Unity Shader Graph to teach me the skills to make an object dissolve use Unity's ShaderGraph. This was created in a similar way to the first shader graph material, so it was quite easy to figure out.
Here is an image of my Shader Graph Nodes that I used to create the material to make my object disappear.
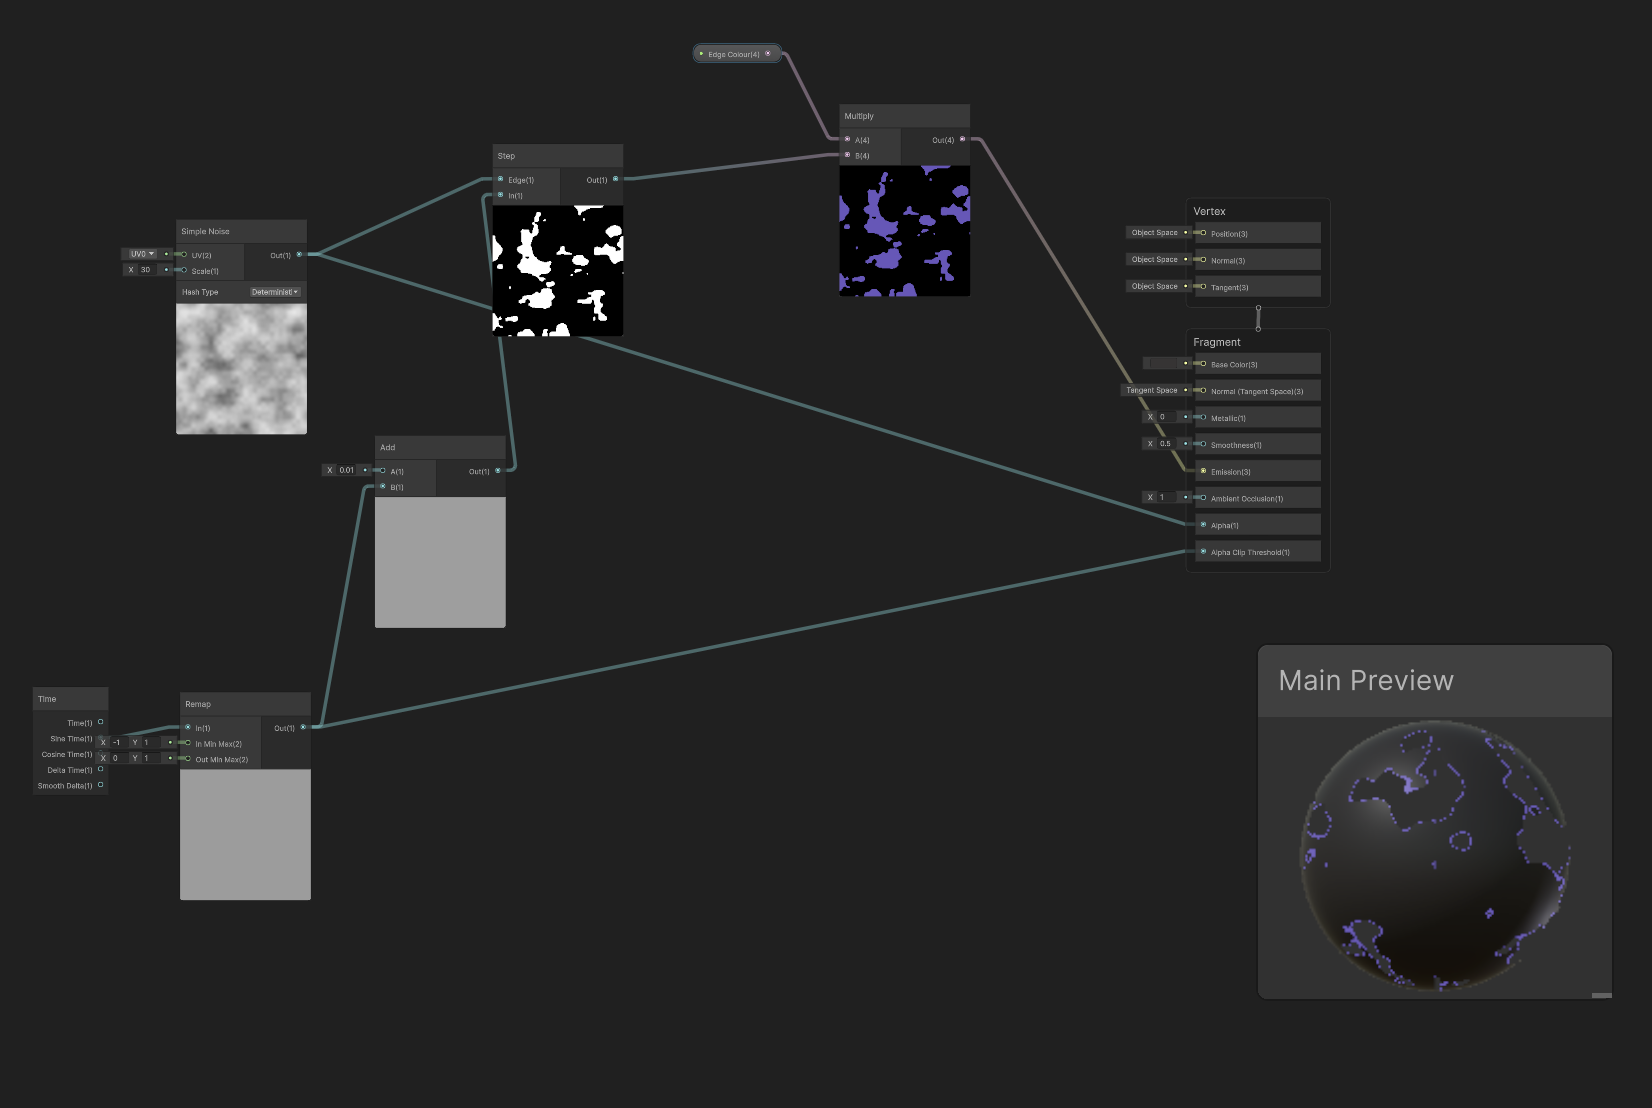
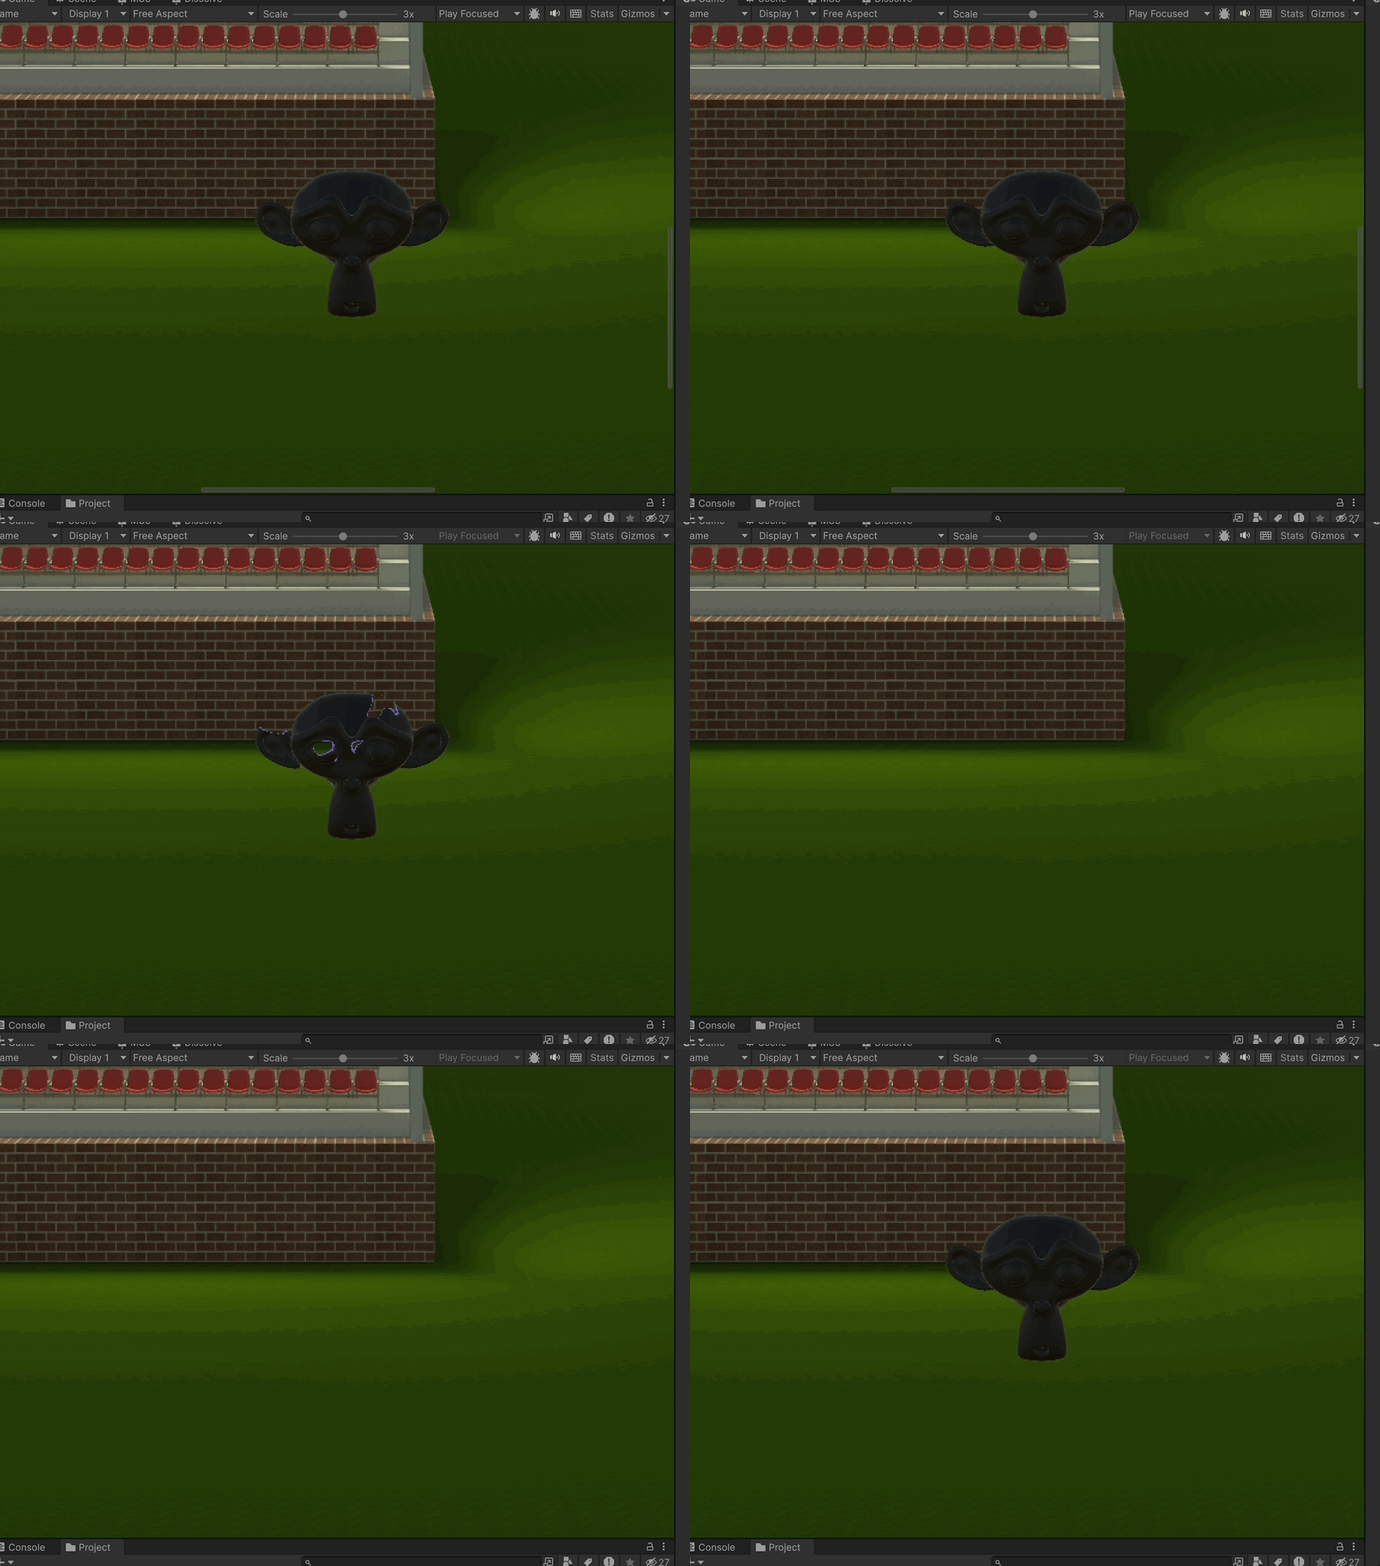
I plan on trying to make my Cenotaph disappear, but that will take quite a bit of time to do as it has lots of different materials to mess with, so that will be done later on.
KIT207 Portfolio
More posts
- Self Study 4, Game IdeasMar 24, 2025
- Self Study 4, A Simple GameMar 24, 2025
- Tutorial 3Mar 18, 2025
- Self Study 3Mar 17, 2025
- Tutorial 2Mar 11, 2025
- Self Study 2Mar 10, 2025
- Week 2 TutorialMar 04, 2025
- Week 1 Self StudyMar 03, 2025
Leave a comment
Log in with itch.io to leave a comment.